Tips for Playing in the Wind

Tips for Playing in the Wind

This time of year (the fall) – it seems the wind seems to pick up (especially if you live in the “flat” states as we do…). You have a choice when playing in the wind – you can either “fight” the wind or not. Let’s talk about what we mean in some different situations.

DSC00210

Wind Into Your Face:  (When you are hitting shots directly into the wind).

First – remember – when you hit a golf shot, the lift on the shot is produced by hitting down into the ball, the hitting down action produces spin which lifts the ball.  When you are hitting into the wind – you DON’T want more spin.  This will produce too much lift and a “ballooned” shot which will go up and come down short of your target.

1.  For every 1 mph of wind into your face add 1 yard.  If 10 mph into your face, add 10 yards… Meaning a 10 mph wind into your face is what is called a 1 club wind.

2. Swing EASY. It is recommended to take 1 more club than you need after taking the wind into effect. For example, if you hit a 7 iron 150 yards, have 10 mph into your face, you would play it as 160 yards (a 6 iron) than add 1 club (a 5 iron). Take 1 more club after factoring the wind so you will swing easy – this easy swing will produce less spin and thus the ball will not balloon up.

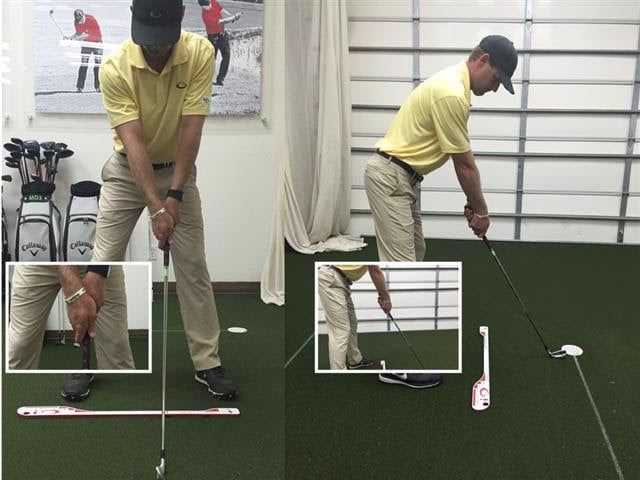
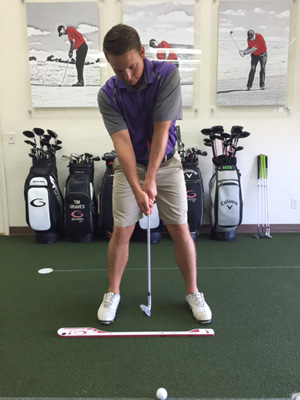
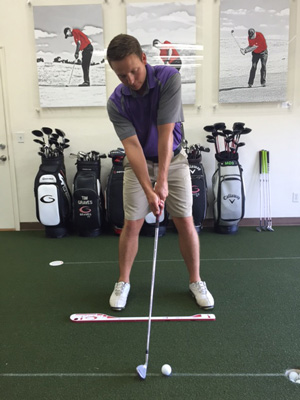
3. Ball position – back up in your stance slightly. It is recommend to back the ball up in your stance slightly in order to help you hold the angles of impact and to help keep the loft off the club. Meaning – make sure you hold angles of impact and don’t break down or “cast” the club. This casting increases loft of the club at impact and will also cause the ball to balloon.

4. Hold impact angle (firm leading wrist) as long as possible. As stated in #3 – this angle will help keep the ball down and not balloon into the wind.

Downwind (Hitting Shots with the Wind):

1. As with the wind into your face – factor wind the same way (except this will add distance to your shots). For every 1 mph of wind downwind – take 1 yard off your shot.  Meaning, if you have 10 mph of wind downwind – take one less club than normal.  If you typically hit a 7 iron 150 yards and have 10 mph wind downwind – hit an 8 iron (or very easy 7 iron).

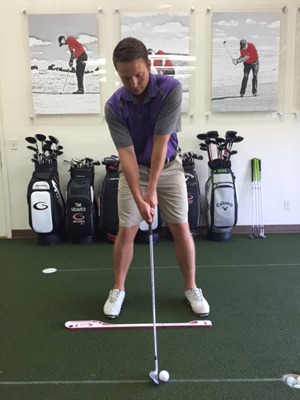
2. Ball position is the same as normal shots (with no wind).

3. When hitting downwind, the wind will take some of the spin off the shot. Meaning, if you typically hit shots that spin or hold greens, downwind shots will not hold as well (less spin). Play shots accordingly – meaning these shots will bounce further when they hit the green and roll out a little more.

4. Severe Downwind Shots… If you have a lot of wind downwind – say 30 to 40 mph downwind – this wind tends to “knock the shots out of the air”. Or in other words, push the ball down to the ground. The reason for this is that amount of wind takes most of the spin off the shot and pushes the ball down. To calculate (a lot by experience) – if 40 mph downwind, you may only take 20 to 30 yards off the shot rather than 40 yards as that much wind will reduce flight of the ball.

Other Points with Downwind Shots –

There is a greater affect the longer the ball is in the air.  Meaning – a 6 iron will be affected by the wind a lot more than a wedge. Both will go further than normal – the 6 iron a longer as it is in the air longer…

Crosswind (Hitting shots with wind right to left or left to right):

1 We typically recommend to “ride the wind”. Meaning, for example, if the wind is blowing right to left and you are right handed, play the shot right of the hole and let the wind blow back to the target. This riding the wind will typically allow you to play the “normal” yardage shot (for example – if you hit a 7 iron from 150 yards, a crosswind 7 iron will still be 150 yards) unless the wind is very severe. If you choose to play into the wind – meaning if right to left wind and you play shot left to right, the shot will react more like an into the wind shot (as described above).

2. When playing a cross wind shot line up accordingly. For example – if a right to left wind – line up slightly to the right and hit the ball as straight as possible – and let the wind do the “work” for you. Try not to push or pull the shot into the wind… typically causes side spin on the shot which is hard to control in normal situations, not to mention windy conditions.

Other Points to Consider When Playing Wind Shots:

1. Wind DOES affect putts. There is wind close to the ground also. Play the wind accordingly when putting. Into the wind – hit a little harder, etc.

2. You might consider playing a slightly harder ball when playing in windy conditions. A harder ball will spin less and be affected less by the wind.

3. Play more fairway woods or hybrids when possible (especially when into the wind). These clubs produce less spin which will be affected less by the wind.

4. Always remember to swing EASIER when in windy conditions – for many it is “instinctive” to swing harder – swinging easier produces less spin and thus the shots will be affected by the wind less.

Good Luck!!

PLEASE don’t hesitate to call or email us anytime!!

Remember – ALWAYS PRACTICE WITH A PURPOSE

Single Plane Experience School – Coming to Virginia and North Carolina Early Next Year

One question we get a lot is “What is this SPE class I see on the website and in emails?” This is a relatively new program for teaching our Single Plane Swing. Instead of students having to come to one of just several locations that we do our 3 and 5 day schools, there are 1 or 2- half day regional schools out there now. We have put Certified Single Plane Instructors across the country to teach the basics of our model swing.

In an SPE you will learn the grip, fundamentals of the Single Plane Swing, putting, chipping and pitching. This is also a great place to get a tune up or refresher from a previous school. Even to just have an actual person tell you how close you are from watching all of those videos that you have at home of Moe and Todd.

I’d like to introduce you to Paul Tessler from Newton Falls, Ohio. Born and raised in Northeast Ohio, Paul graduated from Bowling Green State University in 1975 with a BS in business marketing. He became a PGA Member after college and played professionally until buying his own teaching center in 1983. With an eye for teaching and a desire to help golfers improve their game, Paul has spent 43 years operating a successful teaching center. He has also written numerous articles for Golf Magazine, The Tribune Chronicle and the Ohio Golfer Magazine. His one day SPE classes have also made their way into Newsweek, US News and Time. Paul’s journey to the Single Plane Swing started with his vision of Moe’s swing back in the 1980’s and came to fruition when he first saw Todd’s video explaining the back problems associated with the conventional golf swing. Having given up practicing because of hip and neck pain, Paul is glad to be hitting balls again pain free.

Once again, we listened to your requests for an instructor in these areas and we now have one of our best to head that way for a limited time. Paul will only be on loan for a short time to Virginia (3 weekends in February and March) and North Carolina (TBA) before heading back north to Ohio. Each class will only consist of 5 students.  I hope you have the opportunity to meet and work with Paul.

Shannon Friday, PGA

SPE Program Manager

Limited Practice Time…. Some Suggestions For Your Practice

This year, I interviewed a group of our alumni (dozen students) and asked them a few general golf questions.

Answers to one of the questions interested me quite a bit, in fact, it actually surprised me quite a bit.

I asked them how much they practiced.

Meaning, do they practice every day, every couple of days, once a week, etc. etc..

Response:

Majority said they practiced once or twice a week.

A couple said they practiced every day or at least every other day.

A couple said they never practiced /or basically very little to never. They just played golf.

My Thought:

To be honest, I was surprised. Yes, I know this is a small grouping of golfers, not a good “evaluation” of practice among all our students, but this group is one of our groups that plays a lot of golf, travels for golf and seem to be pretty serious about getting better (at least around us..)

And I definitely expected more practice time… maybe I’m a little “warped” after playing professional golf for a living (practicing up to 8 to 10 hours a day some days…) watching my high school and college golfers/students practice all the time, or maybe I just need a reality check as for the past 13 years I have spent 99% of my time around golf as a living…

So, ultimate reason I wrote this e-tip…

With the “reality check” that many golfers have VERY limited practice time, wanted to give a few suggestions to help improve your game:

1. Spend your time at the course practicing the swing, short game, etc. and break the practice down to what is coming up…

In other words, if you have important rounds or scrambles, etc. Coming up – give extra time to the short game practice.

If not, focus on the long game and some short game. Short game is the scoring part of the game. If you are not in need for “scoring” in the near future – give the limited time to long game practice. (Yes, all those out there that know me might think I have lost my mind saying this, but again, this is for all those with limited to very limited practice time..)

2. Work on flexibility at home as much as possible.

Most have no idea how working on their flexibility will help their swing. Working a few minutes when possible on your flexibility on specific areas related to the golf swing is critical.

3. Indoor/evening/after work practice.

This might be the biggest area most golfers miss that can improve your swing/game dramatically. Work on areas of your swing at home, from the PVC drill, to the leverage bag drill, short training grip club/drill, etc. etc.

Try to set time during commercials, etc. A few minutes in the evenings to work on drills. Most can find a few minutes most evening to work on indoor drills and these can dramatically improve your game.

4. Be creative…

Had a student who told me about his “man cave”….. Yes ladies, sure you could have a place like this too.

He said he had a room in his house with a big screen T.V., an exercise bike, tread mill, an indoor putting mat (with line painted on it for squaring putter face), a leverage bag, mirror, PVC, and short training grip club.

He told me he would go into his man cave and while watching a game on T.V. would practice different areas of his game. At times, he would put one of our videos on the T.V. and check to make sure he was “drilling” correct….

AWESOME!!

Common Fault / Fix – Weak Trail Hand Position

The Fault – Weak Trail Hand Position

A grip is defined as “too weak” when either the lead hand, trail hand, or both hands are rotated too much “towards” the target at address.

We have seen this fault in our golf school students often and it leads to compensations in the motion of the swing.

Gripping the club in a “weak” position creates an incorrect relationship to the club face in the Single Plane Swing.

As seen in the photo above, note the following:

  1. The club shaft moves out of alignment with the trail arm.
  2. The lead arm is not visible above the trail arm.
  3. The trail shoulder is in a high position

With a weak grip, here are some issues golfers will develop:

  1. Incorrect swing plane in the back swing due to improper address
  2. Added rotations/movement of the hands and arms during the swing
  3. A sliced shot
  4. A pulled shot
  5. Topped shots
  6. Weak / short golf shots

The “weak” trail hand position is a flaw that gives many Single Plane Golfers headaches they can’t seem to solve, and is something that we see very often at schools.

Without a good grip, it is nearly impossible to achieve the proper Single Plane Address Position. The correct grip is paramount in building a solid Foundation. The Foundation is made up by the Grip and Address and simplifies the entire motion.

The Fix – Proper Trail Hand Position

As you see above, Moe’s trail hand is in the perfect position. The V formed between the thumb and forefinger point to the trail shoulder at set up.

This will allow:

  1. The club shaft to move in alignment with the trail arm.
  2. The lead arm to be visible above the trail arm (down the line view).
  3. The trail shoulder to be in a proper on plane position.

With a proper grip, golfers will have the ability to:

  1. Be in a good position with a proper set up to have a correct on plane swing plane.
  2. Limit and have proper rotation/movement of the hands and arms during the swing.

Common Fault / Fix: Shaft Out of Alignment with Lead Arm

Fault 1 Fault 2

The Fault – Not establishing the “Rod” Position

When the club shaft is out of alignment with the lead arm at address, we consider this an incorrect position. This alignment is very important when it comes to the Single Plane Swing because it puts the body in a position to move into a perfect takeaway every time.

As seen in the photo above, note the following:

  1. The club shaft is not in alignment with the lead arm.
  2. The hands are behind the golf ball as opposed to ahead.
  3. The club head is directly behind the golf ball
  4. The lead hand wrist is cupped as opposed to being flat

With this incorrect alignment, here are some compensations that golfers will develop:

  1. Improper takeaway due to the hands being behind the ball at address
  2. Early release of the golf club
  3. Hitting behind the ball at impact
  4. Hitting the top of the ball at impact

Ultimately leading to:

  1. Loss of Distance
  2. Loss of Accuracy
  3. Inconsistency
Fix 1 Fix 2

Checkpoints, and Correction for not establishing the “ROD” position

  1. Facing a mirror, get in your set up position.
  2. Place the club head directly beneath your nose, and look at the alignment of the club shaft and lead arm.
  3. The club shaft should be in a direct line with the lead arm, which points to the lead shoulder.
  4. The hands will be ahead of the club head
  5. The butt end of the grip will point towards the lead side of the body

With this correct alignment, golfers will develop:

  1. Proper takeaway due to the hands being ahead of the ball at address
  2. Hitting the ball first at impact
  3. Being able to create a divot (with irons, hybrids and fairway woods) past the golf ball
  4. Solid impact with proper and good compression of the golf ball
  5. Proper and full release of the golf club

Ultimately leading to:

  1. Maintaining and increasing distance
  2. Increase in accuracy
  3. Consistency

LEARN

THE

SWING

Join 1M+ Subscribers to get your FREE Video Quick Start Guide that reveals how to hit the ball farther and straighter more consistently from now on…

START YOUR NEW GOLF SWING